How to check and adjust a drive chain.
Tools needed:
- Basic socket set *COMING SOON* Understanding socket sets *COMING SOON* Upgrading socket sets
- Basic spanners *COMING SOON* Understanding spanners
- Torque wrench *COMING SOON* Upgrading socket sets
- Ruler
- Paddock stand or swing arm stand
- Owners manual
Find the slack – turn off the engine, place bike on a stand and set transmission to neutral.

Locate the mid point between the chain and the sprocket and measure the slack by checking the distance from the lowest to the highest point of the chain.
Check the manual – the owners manual specifies the required slack for the chain and whether it should be checked with the bike on it’s side stand or elevated with a stand.
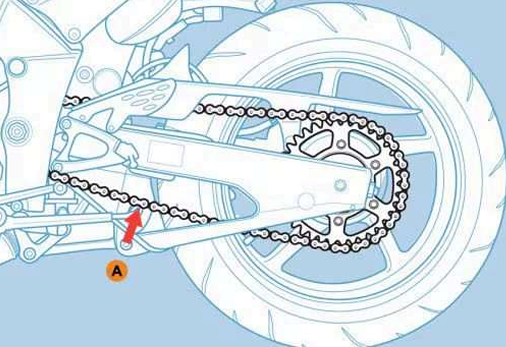
Loosen the spindle nuts – with a spanner one side and a socket the other loosen both sides of the swing arm.
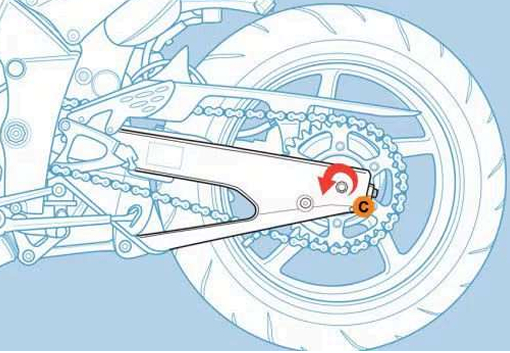
Adjust the chain – turn the adjuster nuts quarter of a turn at a time on both sides of the swing arm.
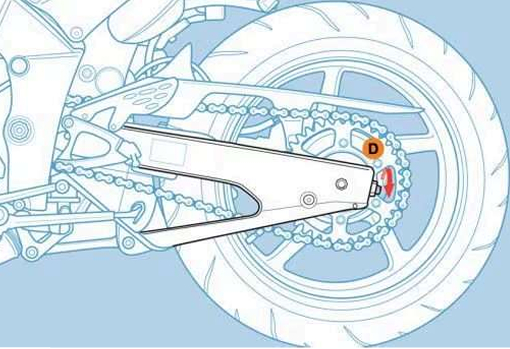
Measure and adjust – continue to measure and adjusting until the chain falls within the specified range.
Check the manual – use a torque wrench and socket to tighten the spindle nuts to the designated torque in the manual.
Additional tips:
- Whilst the bike is raised, lubricate your chain – I use muc-off chain lube.
- The chain and sprocket can be cleaned – I use muc-off chain cleaner and a chain brush.
- It is generally advisable to inspect and adjust your chain on a monthly basis.
- Neglecting a chain can lead to diminished performance and potential injury.

Article written by Nige.
Last update: November 2024
Nige has toured most of the UK and Europe. Nige is a qualified motor vehicle mechanic and in his spare time he restores motorbikes.
We may receive a commission if you purchase a product using the affiliate links on any page of this website. This is at no cost to the purchaser, however does support our website and helps us to continue to build with more great content.